


The most advanced digital imaging software used in real estate video editing is Adobe Photoshop Creative Cloud (CC). Videos are very important to display the sentiments, feelings, and thoughts of prospective buyers. You can also create a series of informational videos about the property not only to give additional knowledge to customers but to impress the clients in general.
Nowaday, realtors or photographers using video editing as a efficient tools to make a new marketing campaign. It not only to give additional knowledge to customers but to impress the clients in general.
There are a number of Adobe CC tools that will allow you have the great video editing you need. You can use these tools to retouch special scenes from the video and create a high-quality output from it. Today, HDR Edit will share with you these 7 tools will make it possible for you to achieve the best marketing results for your business.
1. Using Ripple Edit

To use this tool, you can open it in two ways: Click the Tools window, or hit the B key on the keyboard. Ripple Edit, as the word implies, creates a ripple effect. This tool trims both sides of a layer and can cause a ripple effect throughout the video. If you remove 15 frames from the backend of the footage, the remaining clips will be 15 frames but in a forward manner.
2. The Use of Slip Tool
In using Slip Tool, you first need to have footage before or after the in and out points. To access this tool, you also need to go to the Tools window or click the Y key on the keyboard. You will notice that your cursor will become bi-directional arrows, both pointing to straight vertical lines. You need to drag it left or right to start Slipping. The window will show four different panes. The large panes at the bottom show time codes. They are the in and out points of the present clip you’re slipping. Slip Tool allows you to nail cuts in a dynamic motion.
3. The Slide Tool
This tool works by preserving the in and out points of your chosen footage. Slide tool is responsible for moving the entire footage to either left or right. The Slide Tool is best used when you are completely pleased with the beginning and the end of the chosen clip. All you need to do is use the Tools menu or click the U key.
4. The Rolling Edit Tool
Nearly the same as the Slide Tool, Rolling Edit Tool is used for influencing the in and out clip points. Grouped with the Ripple Tool in the Tools panel, pressing the U button is the shortcut way. Rolling Edit Tool is used whenever the in and out points encounter between footages. Its purpose is to make an update on the points without changing a position of the clips. Changing the position means shortening of one clip and increasing the length of the other. Just click and drag the cut point to use this.
5. The Rate Stretch Tool
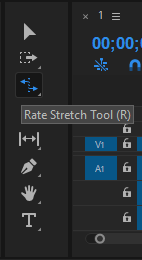
The Rate Stretch Tool (pressing R) is the one that allows change of speed of the footage. You can use this tool efficiently without digging through the menus, right-clicking your mouse, or anticipating what percent of speed you are working at. The Rate Stretch Tool is also found in the Tools window.
6. The Selection Tool
The Selection Tool shortcut is the V key on the keyboard. This is the most basic kind of tool in Premiere. If you want to move a clip from left to right, or you want to shorten the clip, you can use this tool. When you use this tool at the beginning of a clip, it will show a red arrow pointing to the right. Just click and drag to the right and it will trim the beginning of the clip. You can also do this at the end of a clip with the same procedure to follow.
7. The Razor Tool
Its shortcut is C. The Razor Tool is used to cut the beginning or the end of a clip. This tool can give you the option where to begin and where to end the clip. You can make a cut by single-clicking on the footage. Now that you have chosen the specific clips that you wanted, you can go to the Selection Tool and select all the footage that you don’t want in the timeline and hit delete.


